Makeup
Step-By-Step Tutorial for a Classic Smoky Eye Look

Like a painter with a fresh canvas, you’re about to create a masterpiece with your very own eyes. You’ll start by prepping your lids, ensuring they’re smooth and ready for a symphony of shadow.
With each step, you’ll carefully blend the shades, shifting from a soft taupe to a bold, smoldering black.
You’re not just crafting a look; you’re offering a service, providing a touch of elegance to any moment.
As you learn to navigate the nuances of the smoky eye, remember that precision is key, yet it’s the gentle finesse that brings the look together.
You’ll equip yourself with the skills to not only enhance your natural beauty but to share this artistry with those around you, uplifting spirits and building confidence.
Let’s begin your journey into the world of classic smoky eyes.
Key Takeaways
- Preparing the eyelids is essential for a flawless, smoky eye look.
- Use a high-quality eyeshadow base or primer to enhance vibrancy and prevent creasing.
- Apply eyeshadow using a flat brush, patting it onto the lid for maximum pigment.
- Define the crease with a dark grey eyeshadow and blend for a soft and diffused look.
Preparing Your Eyelids
Before diving into the eyeshadow application, you’ll need to prep your eyelids by applying a moisturizer and base to ensure a smooth canvas. This step is crucial for achieving the flawless look that you and your clients seek.
Begin by gently dabbing a hydrating moisturizer around the eye area. This not only helps to reduce the appearance of fine lines but also creates a barrier that protects the delicate skin.
Next, select a high-quality eyeshadow base or primer. A thin layer is all you need to enhance the vibrancy of the eyeshadows and prevent them from creasing throughout the day. Make sure to blend the base evenly across the entire lid, up to the brow bone, and along the lower lash line if your design calls for it. This will help the subsequent colors to adhere better and allow for a more polished blend.
The care with which you prepare the eyelids sets the tone for the entire look. You’re not just applying makeup; you’re crafting an experience for your clients, ensuring they feel confident and beautiful.
With the eyelids prepped, you’re ready to move on to the artistry of the smoky eye.
Applying Base Eyeshadow
Grab your flat brush and pat a brownie taupe eyeshadow across your entire eyelid to set the perfect base for your smoky eye. This neutral shade is key as it’ll help the darker colors blend more smoothly, creating a seamless transition that’s essential for a classic smoky look that serves to enchant and captivate.
Now, to ensure you’re painting the perfect canvas, here’s your checklist:
- Use a primer beforehand to ensure your base eyeshadow adheres well and stays put.
- Gently press the eyeshadow onto your lid to avoid fallout and achieve maximum pigment.
- Cover the entire eyelid up to the crease, setting a foundation that will support the smokier shades to come.
- Keep the edges soft; harsh lines can detract from the smoky effect you’re aiming for.
Remember, the base is all about creating an even tone and texture for the drama that follows. You’re not just applying makeup; you’re crafting an experience, an ambiance that speaks volumes without a word.
Defining the Crease
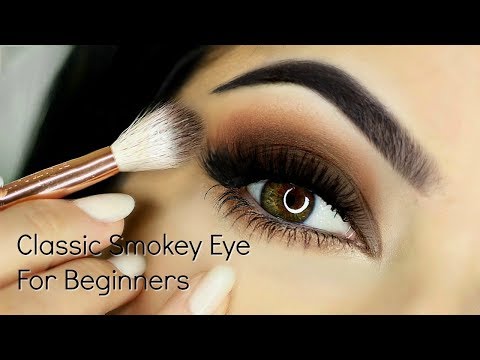
Now that you’ve set a smooth base with the brownie taupe shadow, it’s time to define your crease using the dark grey eyeshadow for that classic smoky depth. This step will give your eyes that sought-after dimension and intensity, perfect for an evening of distinguished service and elegance.
When defining your crease, use a sheer crease brush for blending to ensure a seamless transition. With the dark grey eyeshadow, focus on the socket line and gradually build color in the outer corner. This will create a natural shadow that enhances your eye shape.
Remember, the key to a refined smoky eye is blending. Take a big fluffy brush and blend the edges of your crease color, making sure there are no harsh lines. Your goal is a soft, diffused look that speaks to your attention to detail and care for presentation.
Here’s a quick guide to help you visualize the steps:
| Step | Tool | Color |
|---|---|---|
| 1. Set Base | Flat brush | Brownie taupe |
| 2. Define Crease | Sheer crease brush | Dark grey |
| 3. Build Depth | Crease brush | Dark grey |
| 4. Blend | Fluffy brush | – |
Smudging for Smokiness
Transitioning from the defined crease, it’s time to smudge your eyeshadow to achieve the hallmark smokiness of this look. This technique blends the shadow to create a sultry effect that’s both captivating and serviceable, whether you’re preparing for a client or enhancing your own features for a night out.
To ensure you’re delivering the smokey allure with grace and precision, follow these steps:
Start by using a smudge brush to softly blend the brownie taupe shadow beneath your lower lashes, mirroring the lid’s gradient.
With the same brush, apply the dark grey eyeshadow close to the lash line for added depth, ensuring it’s seamlessly integrated with the taupe.
For a subtle touch of warmth, smudge a light brown shade just below where you’ve applied the grey, creating a dimensional and inviting look.
Maintain the balance of your makeup by checking the smudging doesn’t overwhelm the eyes; instead, it should complement your overall aesthetic.
Mascara and Cleanup
After blending and smudging your eyeshadows, apply a thickening black mascara to your lashes to add the final touch of drama to your smoky eye. A voluptuous sweep of mascara will make your eyes pop and ensure they’re the star of the show. Opt for a formula that promises both volume and length, and don’t be shy to build it up with a couple of layers for that extra oomph.
Next, it’s time to clean up any fallout from your eyeshadow application. Gently wipe away any stray marks with a soft makeup remover on a cotton swab. This step is crucial for a polished look, and it shows your commitment to a flawless finish for whoever you’re pampering.
Once you’ve tidied up the under-eye area, apply a hydrating moisturizer to soothe the skin. Then, lay down a smooth base which will serve as a canvas for the rest of your makeup. Smudge a bit of the light brown shade underneath the eyes to balance the top lid, enhancing the sultry effect of your smoky eye.
Final Touches
Completing your classic smoky eye, you’ll want to choose a nude lip color that complements the intensity of your eyes without competing for attention. This ensures a harmonious balance that allows your smoky eyes to stand out while serving to enhance the overall elegance of your look.
As you finalize your makeup, consider these finishing touches:
- Apply a touch of blush to give your cheeks a subtle, natural flush, which will breathe life into your complexion.
- Keep your brows looking natural and soft; they frame your face and shouldn’t overpower your smoky eyes.
- Freshen up your waterline with a swipe of eyeliner to add that polished touch that pulls the whole eye look together.
- Adjust the intensity of your makeup based on the occasion; you can go lighter for a day event or add more drama for an evening out.
Complementing Your Smoky Eyes
Harmony between your smoky eyes and the rest of your makeup is essential for a cohesive look. As you serve others with your artistry, remember that the allure of smoky eyes can be complemented by the subtlety of a nude lip. This balance ensures that your eyes are the focal point, while the lips provide a soft finish without competing for attention.
A hint of blusher gives life to your cheeks, creating a natural flush that effortlessly enhances the smoky effect. It’s like adding a warm, welcoming smile to the sophisticated mystery of the eyes you’ve crafted. And don’t forget to sculpt the face slightly; it adds definition that frames your masterpiece, highlighting the smoky eyes with finesse.
For occasions demanding a bolder statement, consider the classic combination of smoky eyes with red lips and matching nails. This pairing transforms the look from simply captivating to absolutely stunning, ideal for when you aim to leave a lasting impression.
Adjust the makeup intensity to suit the situation and your personal style. Remember, the goal is to empower and uplift through your work, allowing the inner beauty of those you serve to shine through alongside your creative expression.
Frequently Asked Questions
How to Do the Perfect Smokey Eye Step by Step?
You’ll start with a neutral base, layer darker shades for depth, blend well, and finish with mascara to nail that perfect smoky eye. Remember, it’s all about blending and enhancing your natural beauty.
How to Do a 60s Smokey Eye?
For a 60s smokey eye, you’ll start with brownie taupe over your lid. Add dark grey in the crease and outer corner. Blend well, smudge under eyes, and finish with natural brows and nude lips.
Is Smokey Eye Still in 2023?
Yes, you’re in luck; the smoky eye is still on-trend in 2023, and it’s a chic choice for serving others with an elegant, timeless look that’s adaptable for any event or occasion.
How to Do a Blended Smokey Eye?
To create a blended smoky eye, you’ll need to layer and blend eyeshadows smoothly. Start with a light base, then work darker shades into your crease and outer corners, blending well for a seamless effect.
Conclusion
Now you’ve mastered the classic smoky eye—a look that’s as timeless as it’s seductive. Your eyes are a canvas of smoldering taupe and charcoal, framed by lush lashes.
Remember, it’s all about blending, so keep that brush handy for future glam sessions.
With your understated lips and cheeks, your smoky eyes are the undeniable stars tonight.
Go on and captivate with your newfound finesse. You’re not just ready for the spotlight; you’re owning it.